SecurityPixel - Getting Started
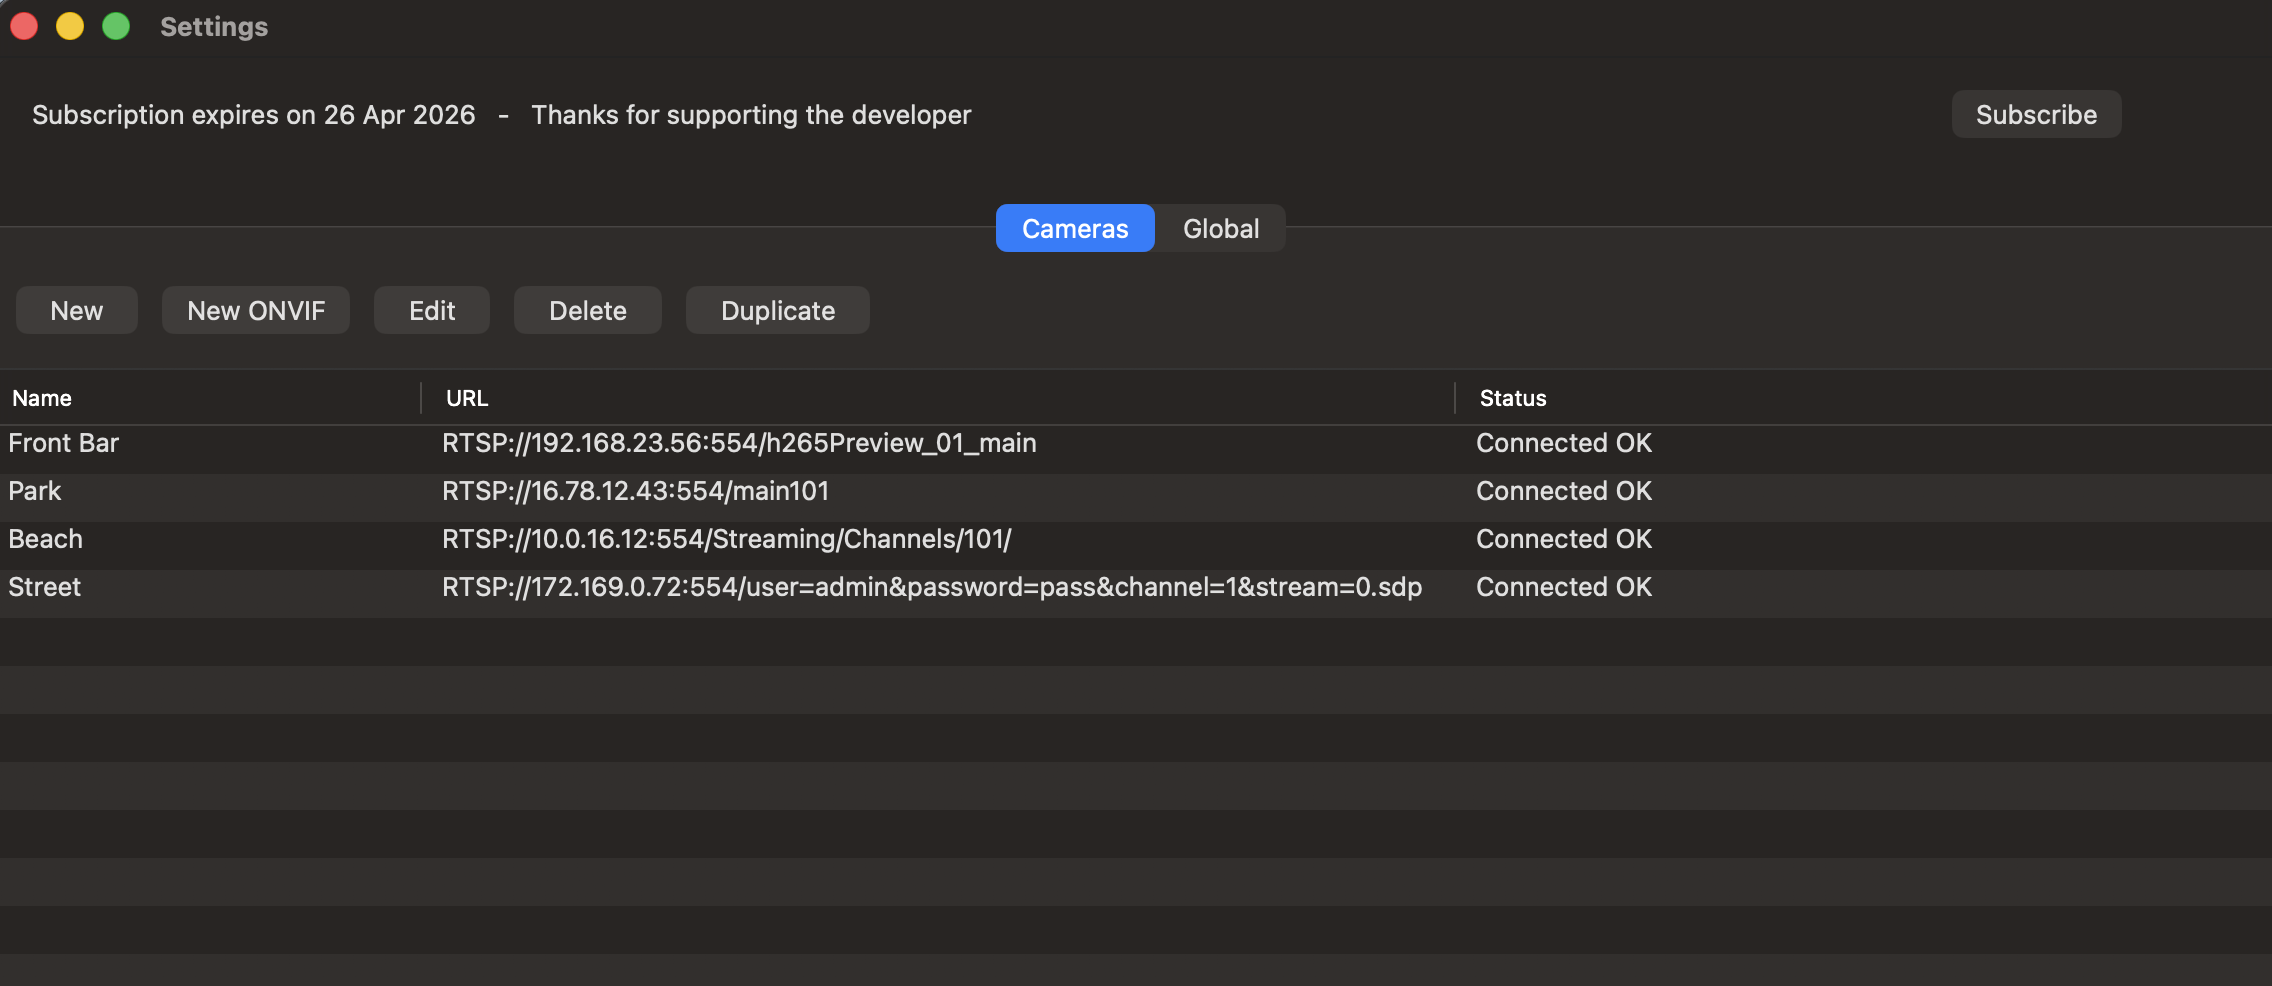
SecurityPixel connects to IP cameras that support RTSP and either H.264 or H.265 video compression. Most standard IP cameras support these standard protocols. Select Settings from the SecurityPixel menu to display this window.
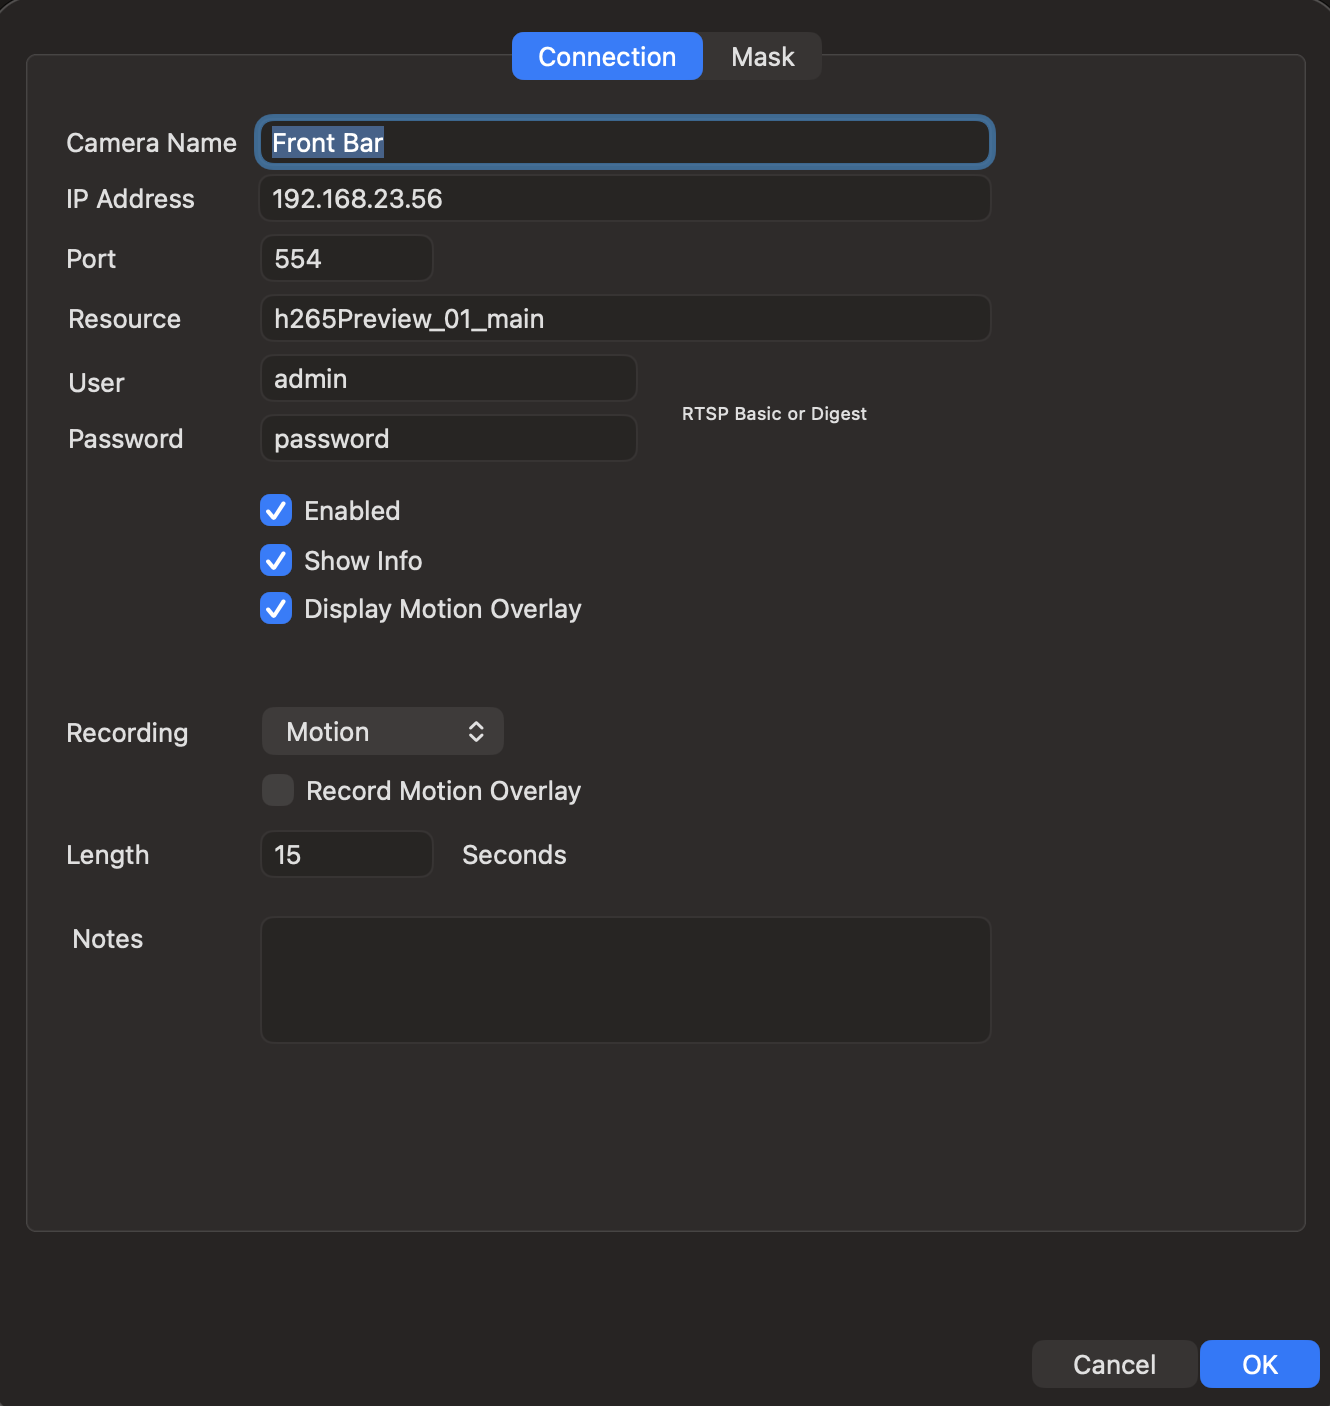
Enter the info to connect to your IP camera. The manufacturer of the camera will provide this info in their documentation.
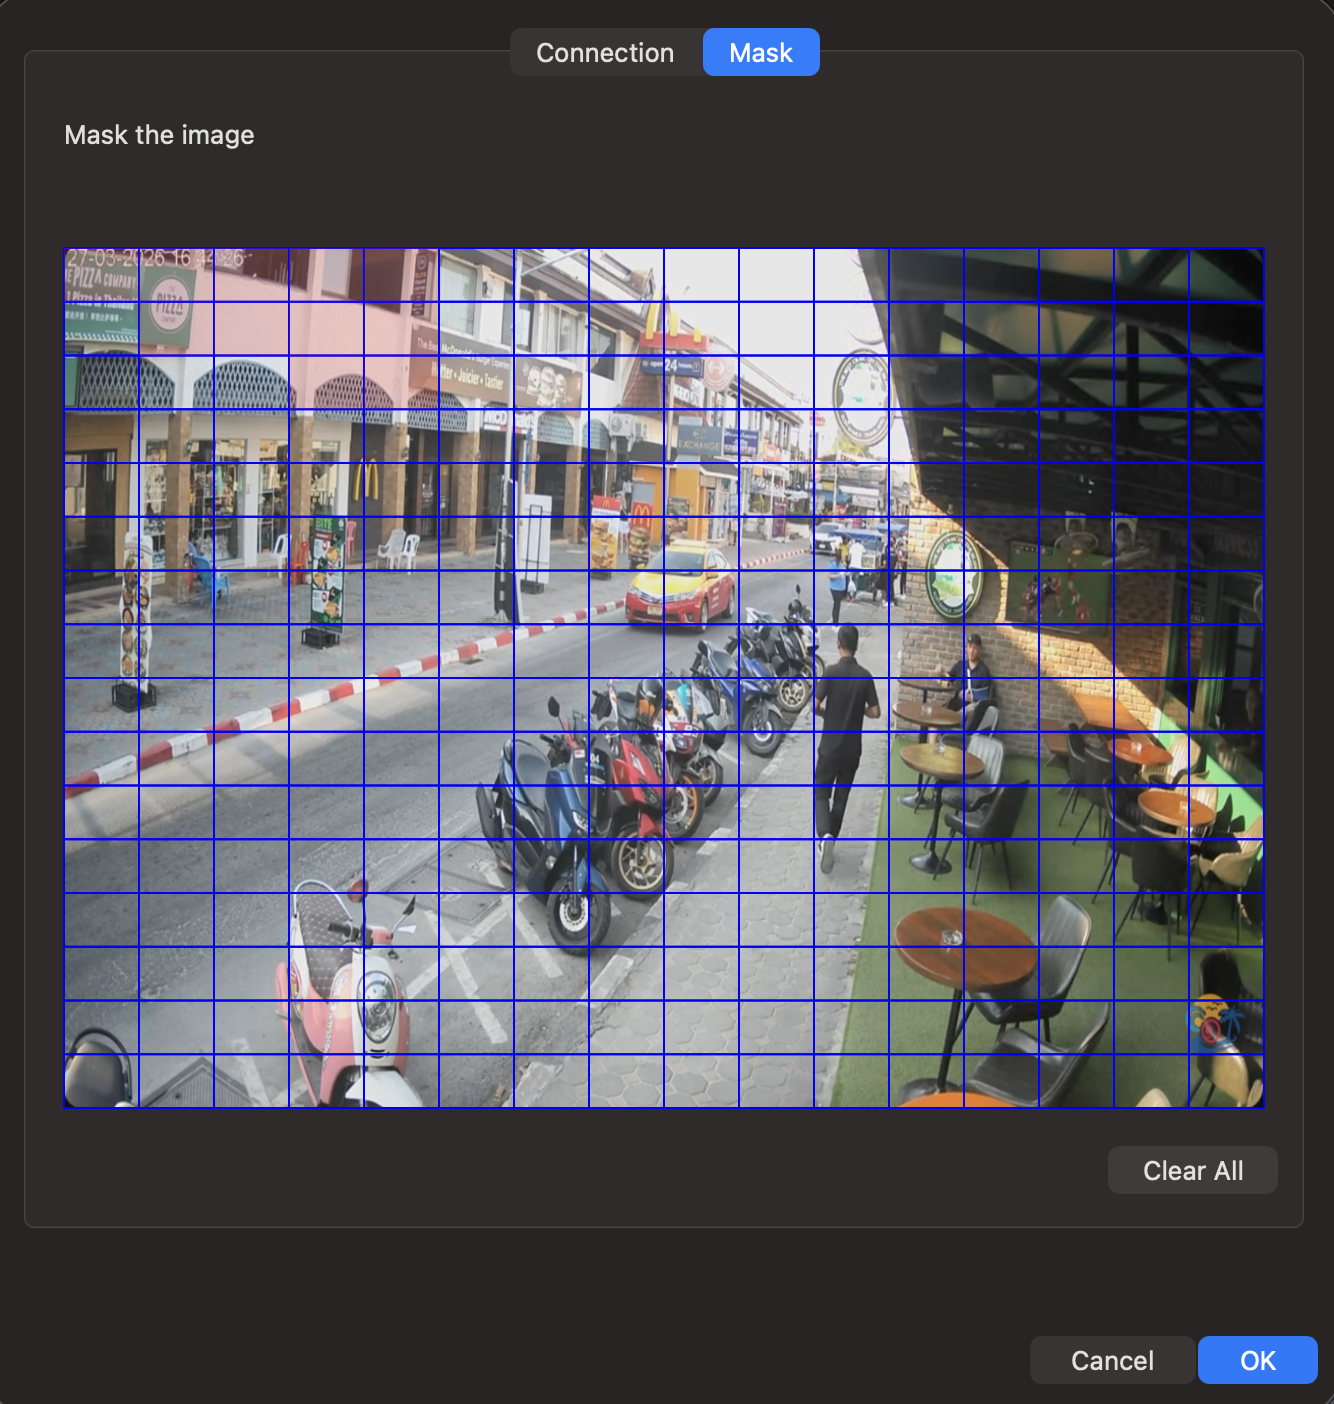
To ignore motion in a part of the video a mask can be configured. Just click on the squares to toggle the mask feature.
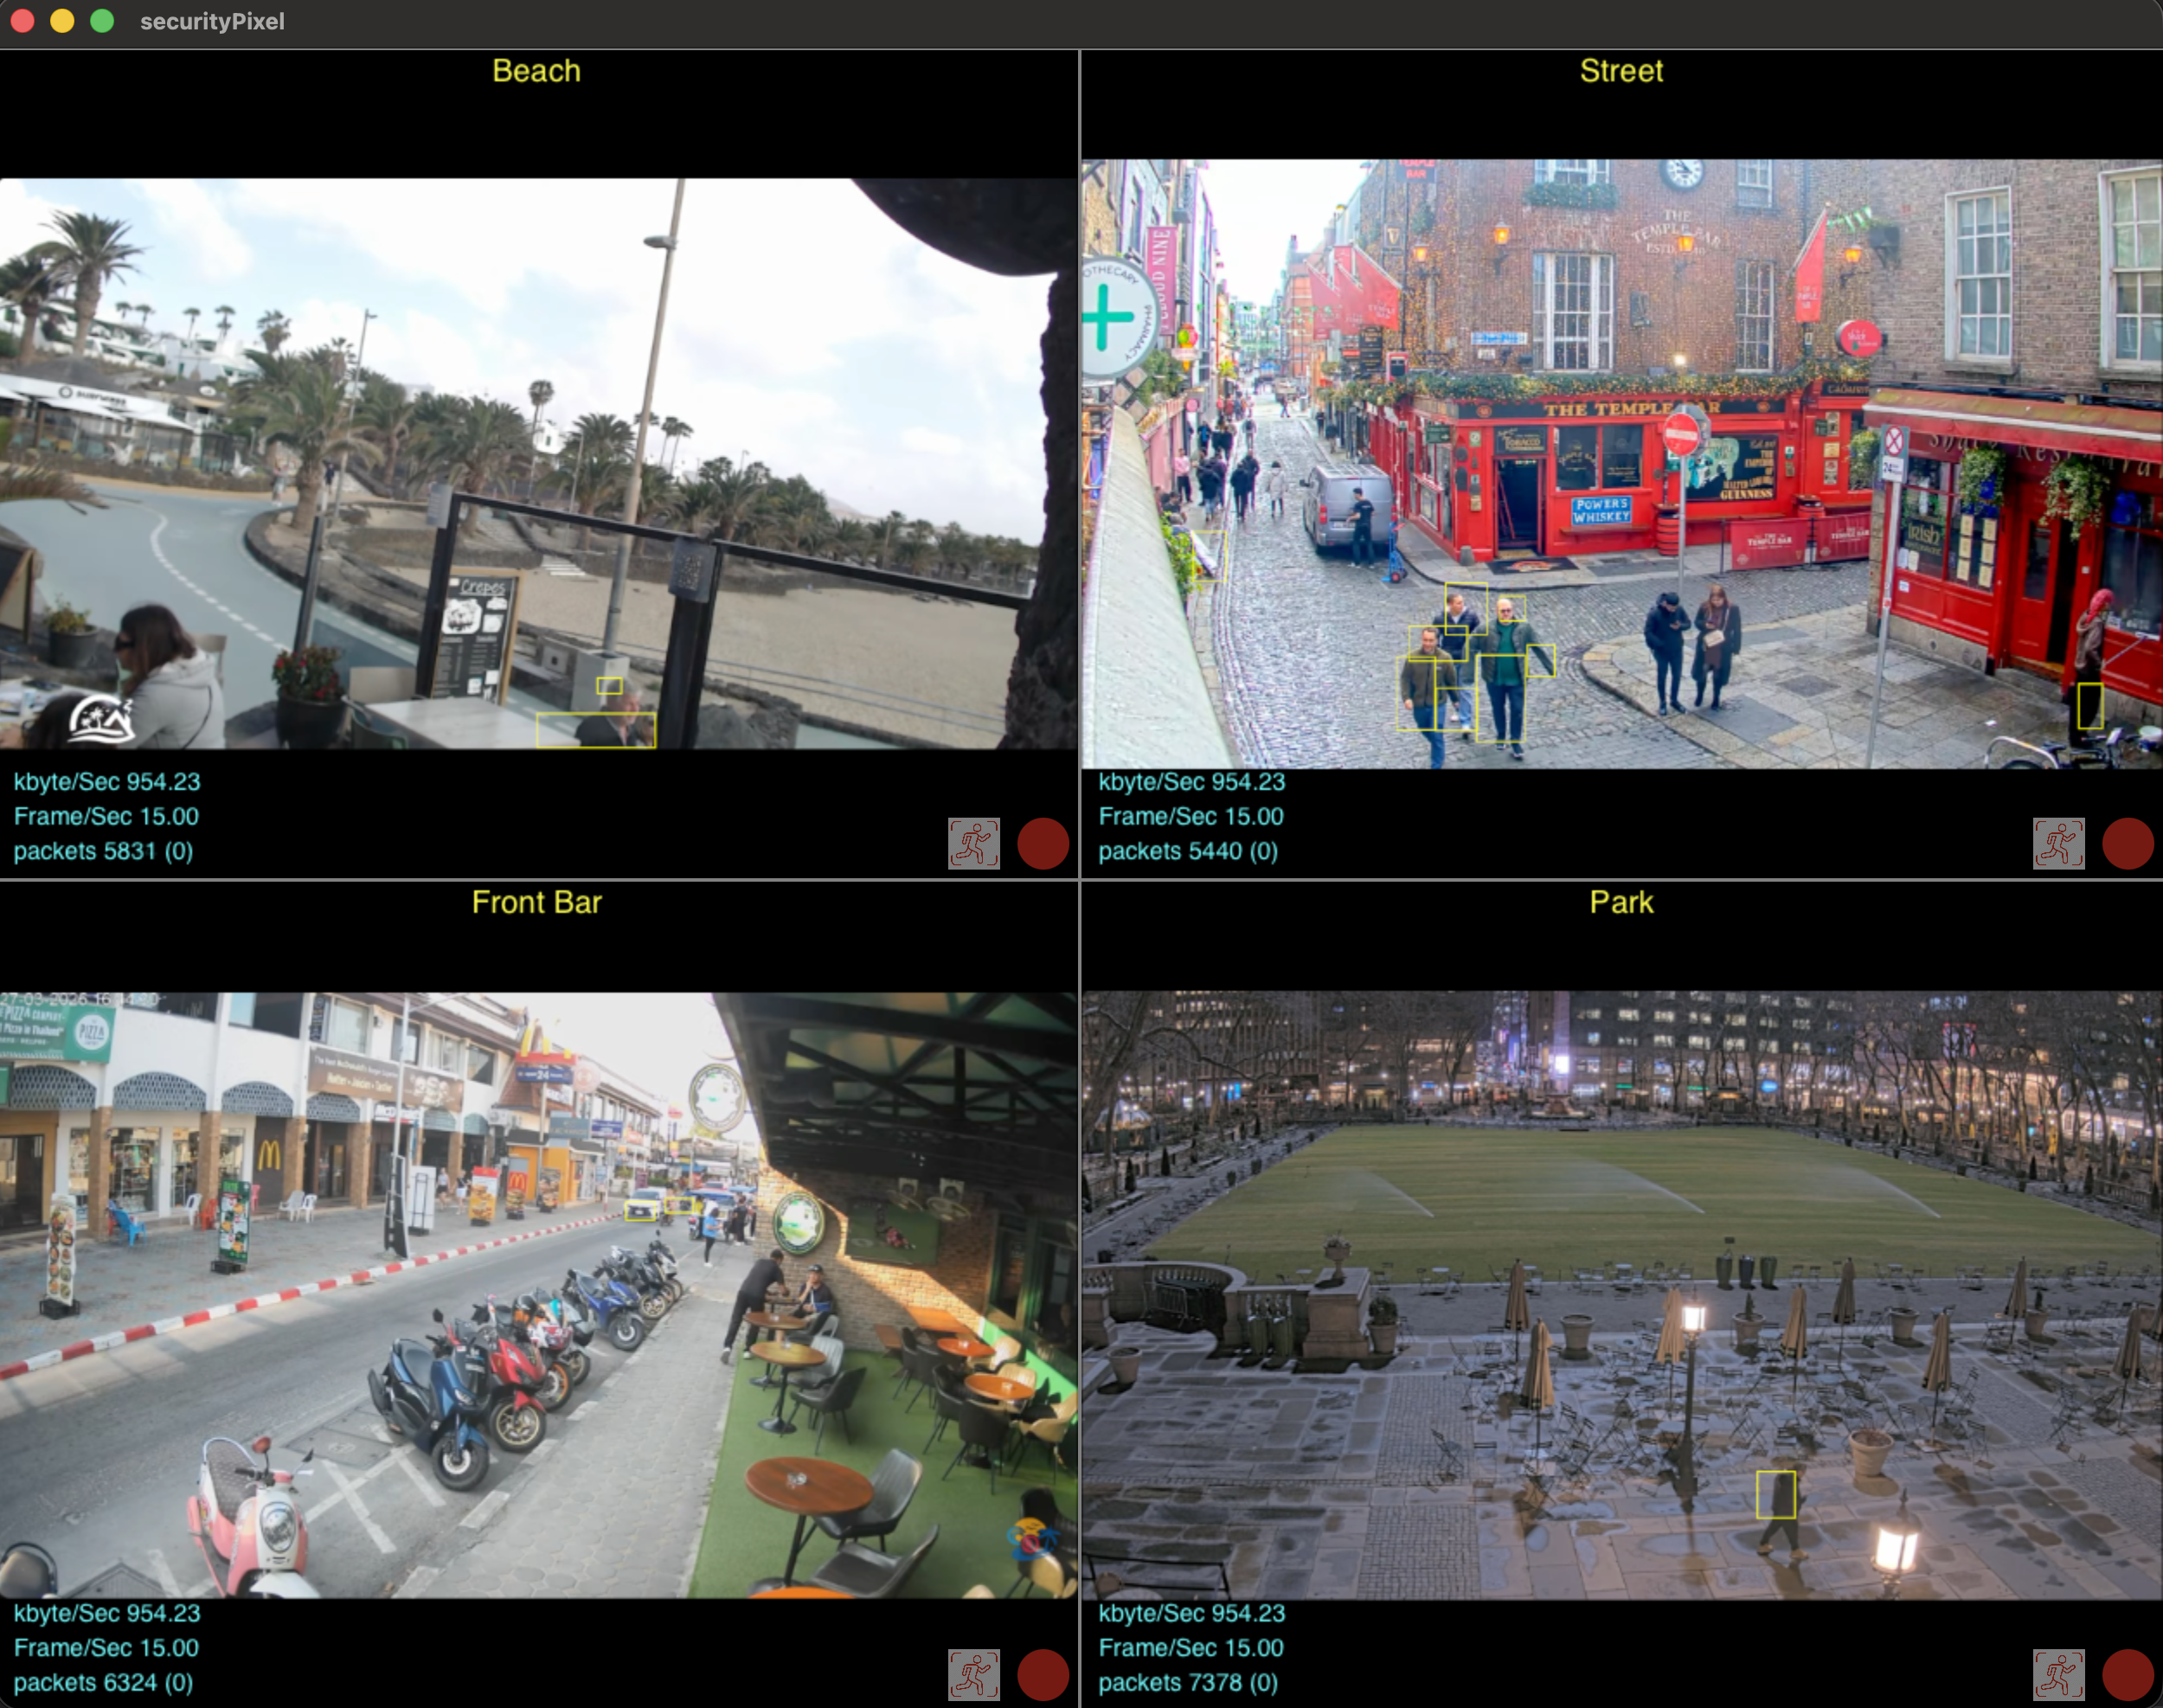
Once your camera is setup it will automatically be displayed in the main window. Click on a camera to zoom in on just that camera. To zoom in further use the zoom and scroll feature on your trackpad or mouse.
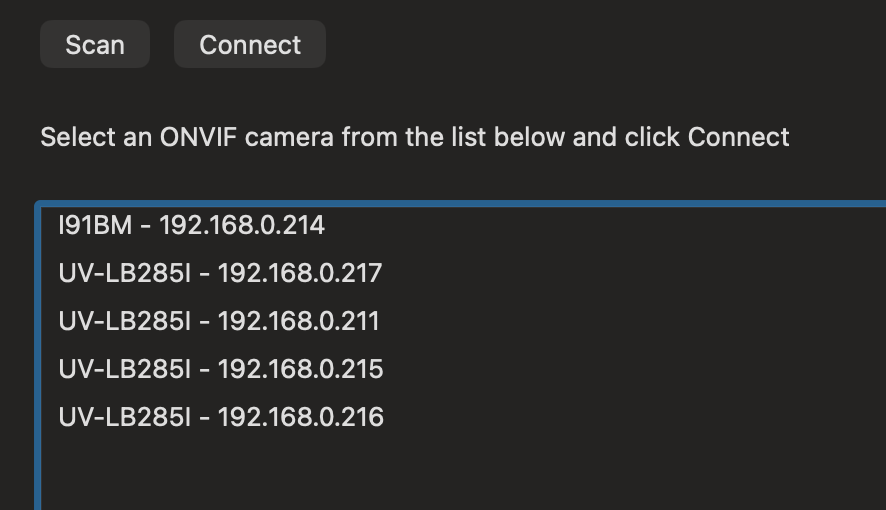
If your camera supports ONVIF you can click New ONVIF and a list of all ONVIF cameras on your local network will be displayed. Select the one you want and click Connect. Depending on the camera you may need to enter the ONVIF password. Note, on some cameras the ONVIF password can be different to the device password.
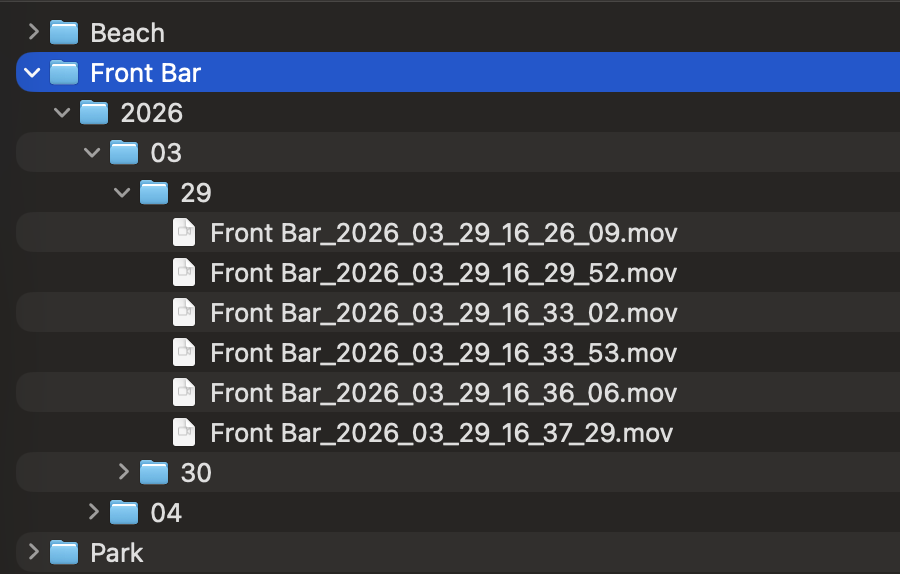
To access the video recordings select Recordings from the View menu and a finder window will open showing all the recordings ordered by camera/year/month/day These are standard .mov files that can be played by selecting a file and hitting the space bar. These files are ready to copy or move to anywhere you desire.
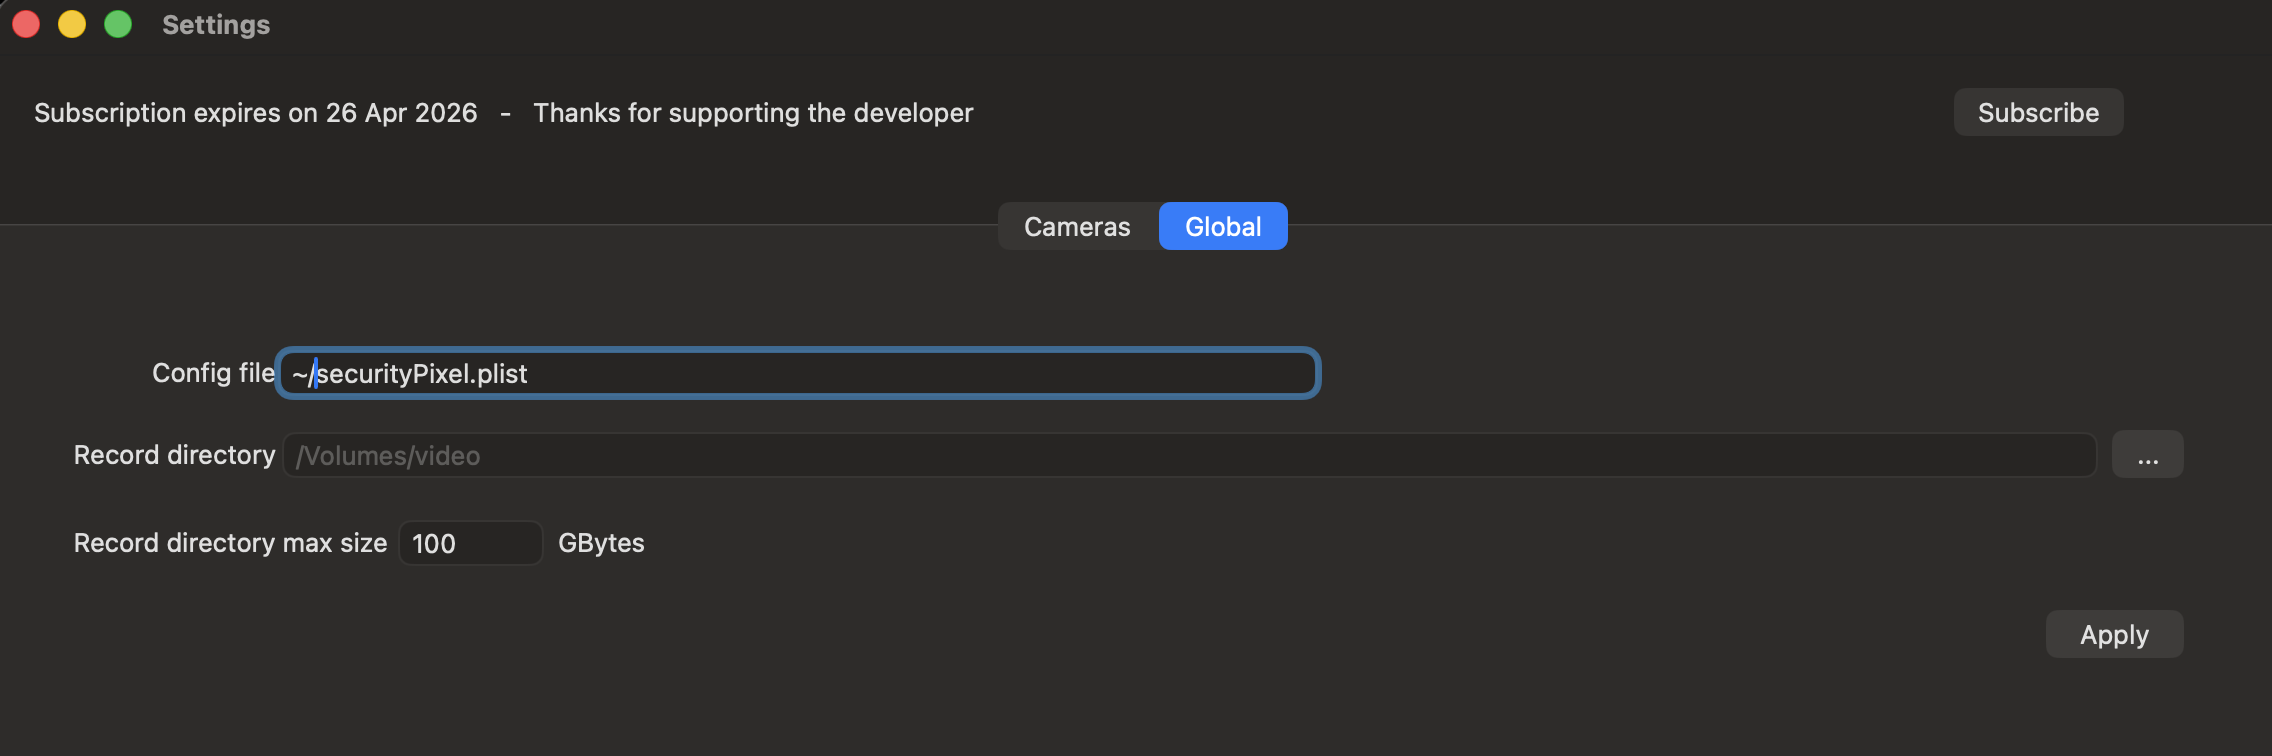
All the camera configurations are stored in a config file. Multiple config files can be created but only the selected file is in use. The location of the recordings can be set to anywhere on your file system such as a large external USB drive. SecurityPixel automatically deletes old recordings once the recording directory gets to the set size.